|
Cocoa
Temperature
Converter Tutorial
(Level: advanced) Requires OMC 2.0, Mac OS 10.5 and Xcode 3.x This is a modified "Temperature Converter Tutorial" demonstrating how to create a custom dialog using Cocoa nib in OMC 2.0. You may want to read the original tutorial for Carbon dialogs because the idea is similar and some concepts might not be explained here and it will be assumed you are familiar with them. Support for Cocoa nibs is new in OMC 2.0. There is an Interface Builder plug-in for OMC controls which makes it easier to set up the controls in Cocoa dialog. This new plug-in requires Interface Builder 3.x. Before we start with our custom nib, we need to add the plug-in to Interface Builder. This is done in Interface Builder preferences dialog. Select "Plug-ins" pane and click "+" button to add new plug-in. 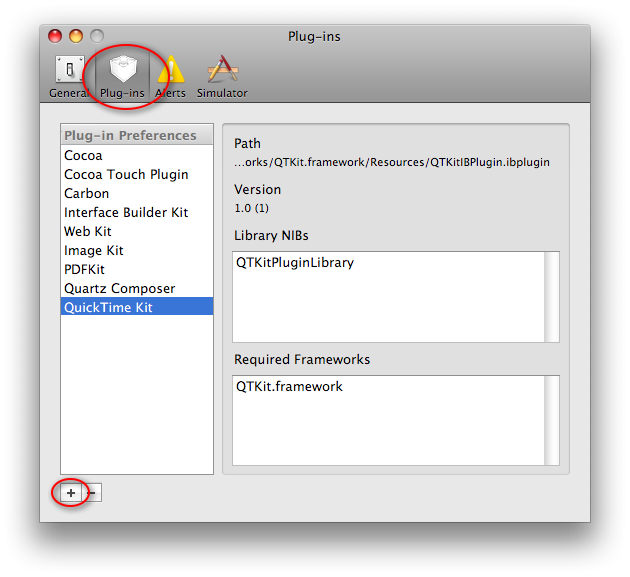 When asked to select a plug-in in file choice panel, go to /Library/Frameworks and select Abracode.framework:  After that you should see that the plug-in is recognized and added to Interface Builder as "OMC Controls":  Close the Preferences dialog. This is a one time step and Interface Builder should now remember this plug-in and always load it. So now let's jump to dialog design for temperature converter. The dialog will have two edit fields: one for Fahrenheit value entered by user and second for displaying calculated Celsius value. In Interface Builder create a new Cocoa nib with window:  Save it on your desktop as "converter.nib", choose NIB 3.x format, not XIB:  |
|
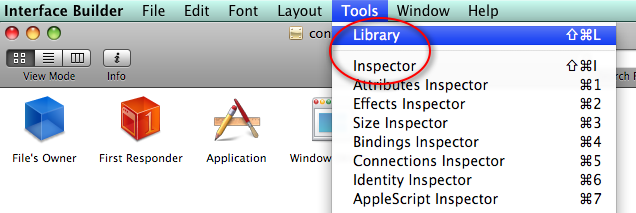
If Library or Inspector palettes are not
visible go to Tools menu and select them:
|
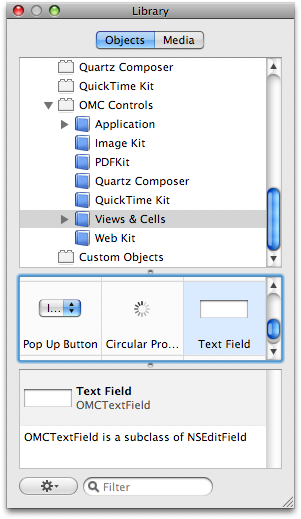
| Looking at the "Library" palette,
browse through "OMC Controls". Those are new items provided by the OMC
plug-in you just added. You can use those items in the cutom dialogs
you build for OMC. These controls are minimal sublasses of standard
Apple's controls providing a handful of additional properties you can
edit in inspector. |
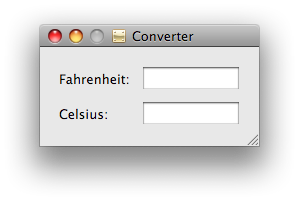
| In this example we will add just
two OMC text fields and two standard static texts/labels. Add those
items by dragging them from Library palette to your new dialog window
so it looks like this: |
|
Select the top edit field and bring Inspector
palette to front. Set tag (control id) to 1 and Command ID to
"Convert". Command ID is the ID of the subcommand to be executed when
the edit field sends the action (when you hit return or tab). Note that
Command ID is no longer limited to 4 characters for Cocoa dialogs. Your
settings should
look like the panel on the left side below.
Next, select the bottom (Celsius) edit field and assign 2 as a tag. You may uncheck "Editable" because this is a result only display field and leave the Command ID empty because this field will not trigger any action (although it might) |


| Now you can save the nib file and
exit Interface Builder. Start OMCEdit, create a new plist file, saving as Command.plist: |

Add new command and name it Cocoa Converter. Leave the "Command" field empty. This is the top level command which gets executed after bringing up the dialog. In our case we don't want to do anything - the conversion work will be done in subcommand. |

| Switch to Nib pane, enter our nib
name and check "Is Cocoa". In this simple tutorial we don't initialize
the dialog so we leave the init subcommand ID empty. We don't want any
actions on OK or Cancel so we leave those fields empty as well. |

| Next step is to create a
subcommand which will be triggered to perform the calculation and set
the 2nd edit field value. Do not just duplicate the first command
because you will get the unwanted nib settings. Set the Comamnd ID to
be the same as Command ID for top edit field in Interface Builder. This is the whole secret to connecting controls to command handlers. |

Now the geeky part is to write a script to convert the temperature. Just for fun we will write it in Perl. You can type the following in Terminal:
And the final Perl script in OMCEdit is as pictured below. $fahrenheit value comes from edit field 1. $celsius2 is rounded to two decimal places. The last line executes omc_dialog_control to set the value for edit field 2. |

Because we wrote the script in Perl we need to change the execution mode to use Perl instead of default 'sh' shell. We set the "Popen Shell" to use perl -e |

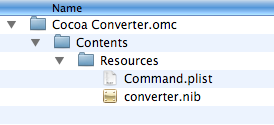
| Now save the plist, switch to
Finder and locate the Command.plist you created. For even more fun we will not create a droplet application of this command but rather an external OMC bundle so it is accessible from contextual menu. Create a new folder and name it 'Cocoa Converter.omc'. Inside, create 'Contents' folder and then 'Resources' inside 'Contents'. Put both converter.nib and Command.plist in the Resources folder so it all looks like this: |
| Now drag the 'Cocoa Converter.omc' on OMCEdit and hit Install button when you get this dialog: |

| And that's all. If everything
went well you may ctrl-click on desktop, select "Cocoa Converter" and
see the dialog running (and hopefully working). The complete example is available in /Applications/OMC/Examples/External modules. |